Vendor Master | DocumentationTable of Contents |
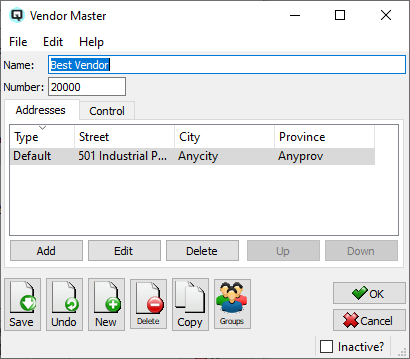
The name of the company.
Enter a number that can be used to identify a vendor.
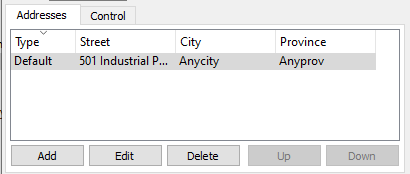
Add a new vendor address. When you click on the add button the "Add Address" screen will be displayed.
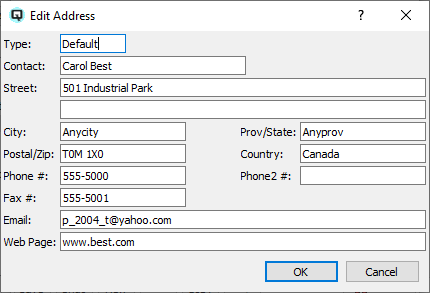
The type of address.
Enter contact name.
The street address of the vendor.
The city in which the vendor resides or conducts business.
The province in which the vendor resides or conducts business.
The vendor's postal/zip code.
The country in which the vendor resides.
The vendor's primary phone number.
The vendor's alternate phone number.
The vendor's fax number.
The vendor's email address.
The vendor's Internet URL address.
Edit an existing vendor address.
Delete an existing vendor address.
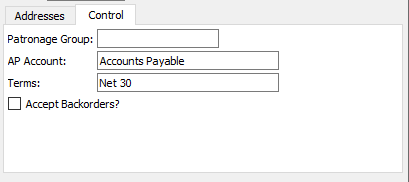
Controls specific to this vendor.
Some organization elect to pay out patronage to the vendors that support them. Enter the patronage group.
Select the payable account that all transactions for this vendor will be posted to.
Enter the payment terms for this vendor. An existing set of terms may be used or a new set of terms may be defined. The payment terms entered here will appear by default on vendor invoices. (More)
Toggle on or off. Toggle on if you accept backorders from your suppliers. If you do not accept backorders toggle off. When in the off position all purchase orders from the supplier will be set to inactive as soon as you receive products with reference to the purchase order. This is very important for maintaining accurate on order statistics.
Toggle on or off. Toggle on if the vendor is no longer active. Quasar Accounting will not allow vendors with a payable balance to be set to inactive. Toggle on to make the vendor active again.