Print Labels | DocumentationTable of Contents |
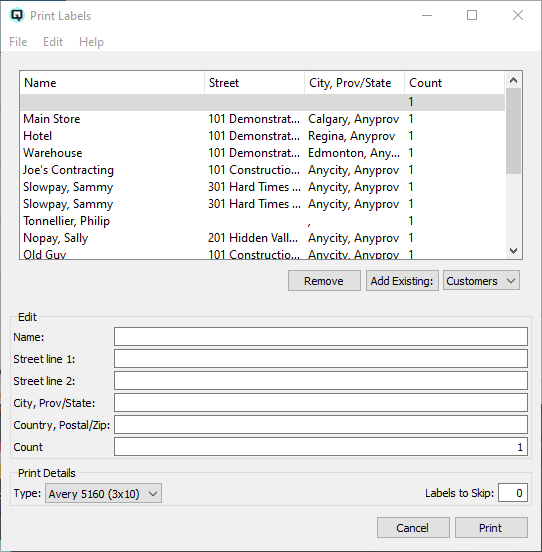
The print label screen is used to print mailing labels for existing stores, customers, vendors, employees or personal acquaintances. You can also print labels by just entering in the data for the label to print.
Remove a label to print by clicking on the "Remove" button.
Add existing stores, customers, vendors, employees or personal acquaintances to print labels by clicking on the "Add Existing" button.
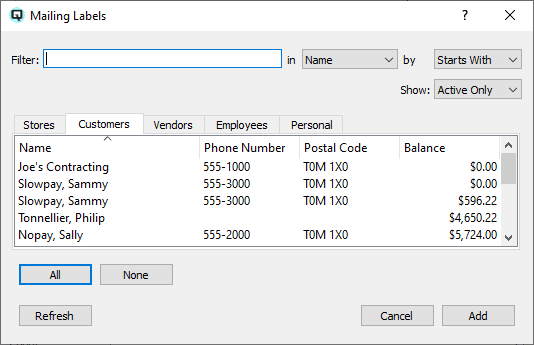
You can can use the filters at the top of the mailing label screen to filter out unwanted choices. You can select all labels to add by clicking on the "All" button. You can remove your selection to add by clicking on the "None" button. You can select random labels to add by clicking on the label you wish to add. Once you have selected the labels you wish to add, click on the "Add" button to add your selection to the list of labels to print.
Select the stores to print mailing labels.
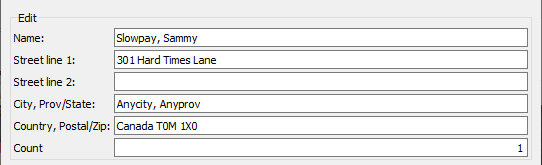
High-light the name to edit and use the edit section to edit as required.
Select a predefined label type. Print one of each type to view. Note that the page type and paper size selected when printing must correspond with the label type.
If you have already printed labels and wish to save the remainder of your labels on a page, you can enter the labels to skip and Quasar will begin printing on the next available label.