Journal Entry | DocumentationTable of Contents |
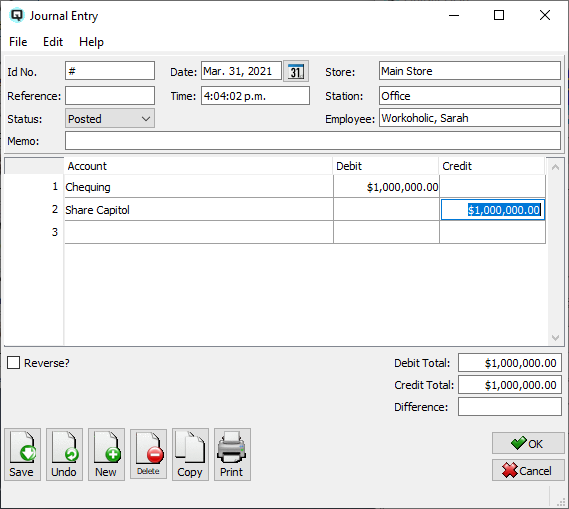
The "Journal Entry" window is used to create ledger account postings. The total amounts of the debits and credits must match exactly for the journal entry to post.
The id number is incremented by Quasar. This may be changed by the user. If the id number entered is the same as an existing id then a warning message will be displayed.
A number that references the journal entry.
The date for the journal entry. The date determines the accounting period in which the journal entry will be posted.
The time that the journal entry is created.
The shift that the journal entry is linked to through a shift close.
Enter the store that the journal posting will affect.
The station (work station) on which the journal entry is created.
The employee creating the journal entry.
The default status. Set to "Posted" to post the transaction to the general ledger.
Set to "Suspended" if the journal entry is not yet posted to the general ledger.
The journal entry is voided or inactive.
Defines the journal entry.
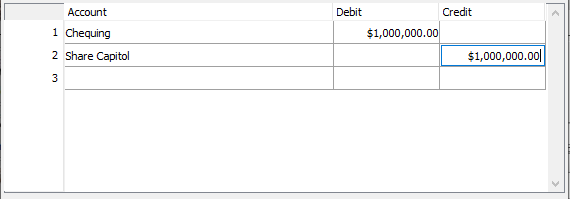
Enter the accounts and amounts to post.
The name of an account to which a journal entry will be posted. The amount of the posting must be entered in either the debit column or the credit column but not both.
The amount of debit that will be posted to the account.
The amount of credit that will be posted to the account.
Enter a memo to describe a journal entry.
Quasar displays the total of all debits.
Quasar displays the total of all credits.
Quasar displays the difference between the total debits and the total credits. In order for a transaction to post there must be no difference between the total debits and credits.
Toggle on or off. Toggle on if the journal entry must be reversed at the beginning of the following month. Toggle off if the journal entry is not to be reversed.
Toggle on or off. Toggle on to void the transaction. Toggle off to reinstate the transaction.