Vendor Claim | DocumentationTable of Contents |
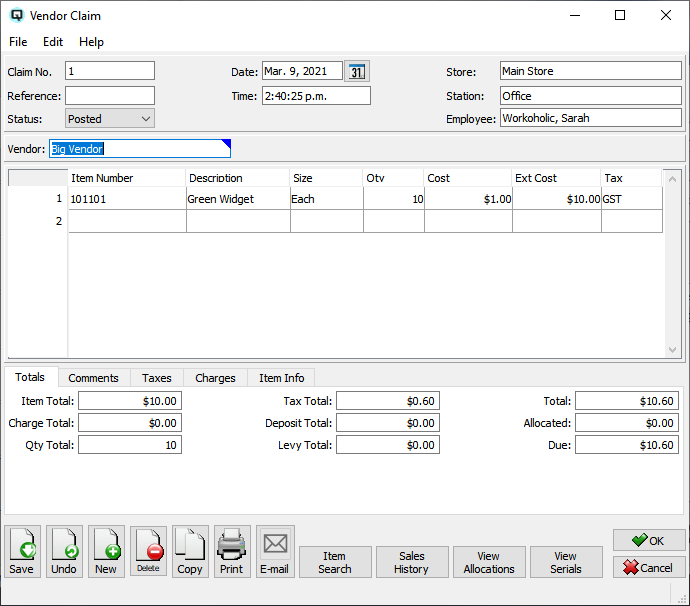
Use the vendor claim screen to record the return of items to a vendor.
The claim number is incremented by Quasar. This may be changed by the user. If the claim number entered is the same as an existing claim number then a warning message will be displayed.
A number that references the claim.
The default status. Set to "Posted" to post the transaction to the general ledger.
Set to "Suspended" if the claim is not yet posted to the general ledger. You can suspend an incomplete claim and work with it at a later date, posting it when you are finished.
The claim is voided or inactive.
The date for the claim. The date determines the accounting period in which the claim will be posted.
The time that the claim is created.
Select or change the default store. If a store has been defined for the user, then the user's store will display by default. If no store has been defined for the user, then the default store specified in the "Quasar Configuration" will be displayed.
The station (work station) on which the claim is created.
The employee creating the claim.
Select or enter the vendor for the claim.
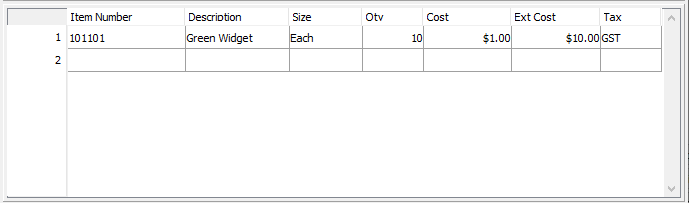
Enter the items, quantity and cost of the items on the claim.
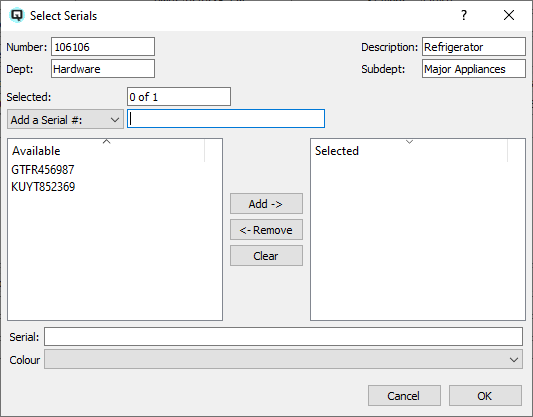
The item number of the item invoiced. Note that if you enter an item that requires serial number tracking the "Select Serials" screen will be displayed. From this screen you can select a serial number for the items being returned.
The description of the item claimed.
The size of the item claimed.
The quantity of units (size) claimed.
The vendor cost for the item being claimed.
The extended cost of the line.
The tax code defining the taxes that are applicable.
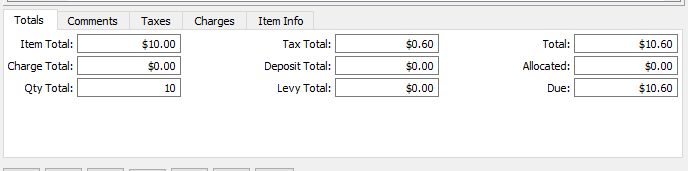
The totals folder displays the various totals for the claim.
The sub-total of all items prior to charges, taxes and container deposits.
The total of all internal charges applied to all items. An internal charge is a charge that is included on the claim. For example, A franchiser may charge a franchise a service charge which will be claimed back.
The quantity of units claimed.
The total of all taxes on the claimed.
The total of all container deposits applicable on the claimed.
The total amount of environmental levies on the claim.
The total of all items, taxes, charges and container deposits on the claim.
The amount charged back to the vendor on this claim.
The balance owed to you by the vendor. (total amount minus paid)
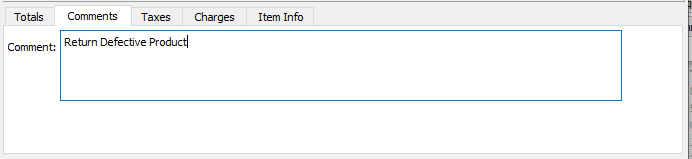
Enter comments that are specific to the claim.
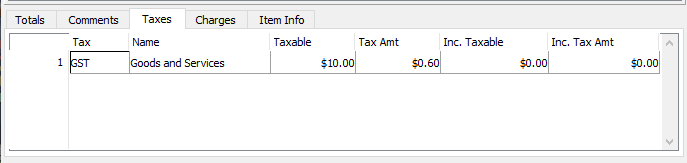
Displays the individual taxes and tax totals applicable to the claim.
The identification of the tax.
The name of the tax.
The net base amount that a given tax is charged to.
The amount of tax allocated to the "Taxable" amount.
The net base taxable amount including the amount of the tax. (for items with taxes included in the price)
The net amount of tax calculated from the "Inc. Taxable" amount.
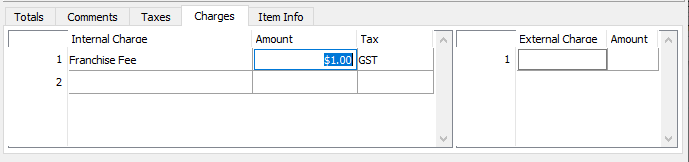
Use the charges folder to define internal and external charges that will affect the claim.
Use the internal charges table to define internal charges affecting the claim. Internal charges will be included on the credit note from the vendor. An example of an internal charge is where a franchiser bills a franchisee a service fee.
Enter or select the internal charge to apply.
The amount of the internal charge on the claim. This may be calculated or entered.
Displays the tax code applicable to the charge.
Use the external charge table to define charges that will increase the landed cost of the item. External charges will not print on the hard copy of the claim nor will they impact vendor payables. The purpose of defining external charges on an invoice is to provide the ability to calculate the landed cost of each item. An example of an external charge is freight from a third party carrier.
An external charge on a claim that allocates back to items will in fact decrease the inventory value of each item and decreases the inventory ledger account. The offsetting entry is made to the accrual account specified in the charges master.
Enter or select the external charge to apply.
Displays the tax code applicable to the charge.
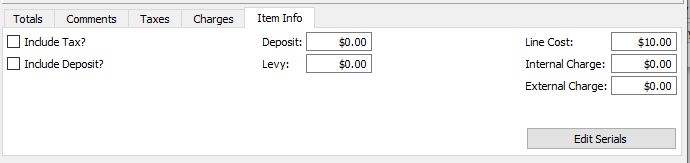
The item info folder displays specific information on the line where your cursor resides in the item entry table.
Toggle on or off. Toggle on if the cost of the item includes tax.
Toggle on or off. Toggle on if the cost of the item includes the container deposit.
Displays the total amount of the container deposit for the item.
Displays the total levy for the item line.
Displays the total vendor cost for the item.
Displays the total amount of internal charges allocated to the item.
Displays the total amount of the external charge allocated to the item.
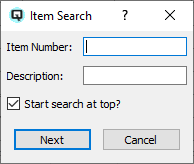
Click on the "Item Search" button to search for items in large claims. You can search by item or by description.
Click on the "Sales History" button to display the sales history for the item in the line where your cursor resides. As you move from one item to another the sales history will refresh and display the history for the current item.
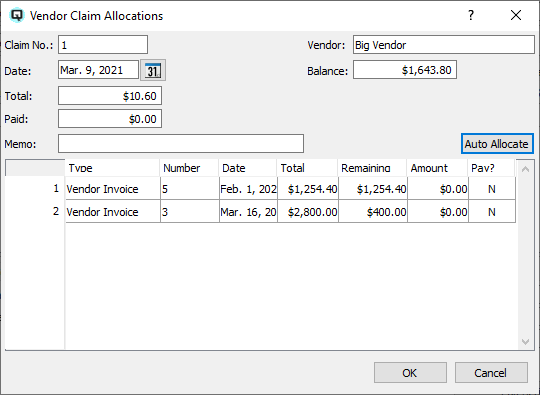
Click on the "View Allocations" button to allocate a claim to an invoice. Clicking on "View Allocations" will cause the "Vendor Claims Allocation" window to be displayed. This window will display all transactions that can be allocated to the claim.
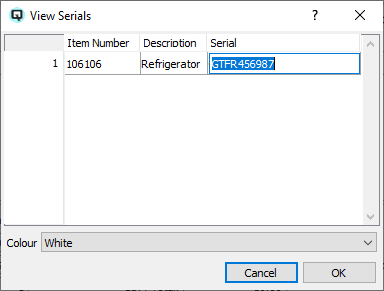
Click on the view serials button to view items on the claim that require serial number tracking.

Click on the production batches button to view items that exist in production batches with expiry dates that can be returned.